Video Transcript
TIG Welding – “The Aluminum Drill” Revisited
In this video, I’m padding aluminum beads. It’s some of the best practice you can get. I call this the aluminum drill. I’ve done versions of this before. I never was happy with the way they came out, so this time, I put a lot of care into it, and I’m using a Furick clear number eight cup, so you can … it just kind of lights everything up. You can see everything a lot better, and that makes it more instructional, so let’s do it.
I’m going to be welding on a piece of quarter inch thick aluminum plate, so I’ve got the machine maxed out at 200 amps. At times, I’ll be at full pedal. Sometimes, I won’t be. Balance 67% and I’m going to set the frequency rather low. I’ve been experimenting a lot lately with using lower frequencies instead of higher frequencies, even though I’m on an inverted machine and I could go up to a few hundred hertz. I’m kind of liking the low frequencies for certain things. I did some testing here on penetration, on some thin wall aluminum tubing, and the results were pretty dad-gum interesting.
Anyway, back to the padding beads. This is the piece that I’m going to be using. It’s a piece of scrap from a machinist job that something went wrong or there was extras, and it’s … I cleaned it up really good, wiped it down with acetone. You want to clean aluminum as much as you can. A wire brush works good sometimes. Sometimes, there’s print on there or tape residue or something like that and you want to get rid of all that, so this is really clean.
I’ve got a little block here that I’m going to be propping on. A lot of people like to keep a little piece of a four by four or piece of wood or something on their table, or a block of aluminum. You can use pretty much anything for that. There are also even stands available to prop on that are adjustable.
So I’m going to run a bead down the edge first, and that’s kind of like just … the reason is, I want to heat this thing up. So I’m letting that cleaning action cook the aluminum oxide away there before I ever puddle it, and then I’m going to run a bead all the way around the outside. That’s good practice, and it’s also going to preheat the whole piece and let things go better.
Edge buildup like this is a good practice. It’s a good skill to have. It’s very applicable. Sometimes, you have to do it. And you see on the edge here, even though that’s a quarter inch thick, I’m hovering around 107 amps, 108 amps. It doesn’t take that much heat to weld on an edge, and when you’re welding an aluminum part, that’s kind of an interesting thing. You can go at it with a strategy, weld the areas that don’t take much heat first. Sometimes you can do that, anyway, and that builds heat up in the part, and again, things just go better.
Aluminum is so conductive, it just takes more heat to weld it than it does steel or stainless steel. And if you have to go take a break or go eat lunch or something and you come back to an aluminum piece that you had warmed up really nice, it’s a huge difference on the amount of amperage it takes to get it going again.
Now, my friend Roy likes to use a hot plate like this for small parts, so he stages them. Like, if he has 10 of these to do, he stages them all in line, and he keeps one on the hot plate while he’s welding one, and he just keeps rotating them like that. And that hot plate will get that thing up to 2 or 300 degrees before he needs to weld on it, and then the welding just goes a lot quicker and a lot smoother. Again, if you’re limited to a 200 or even maybe a 250 amp machine, a little bit of pre-heat goes a long way.
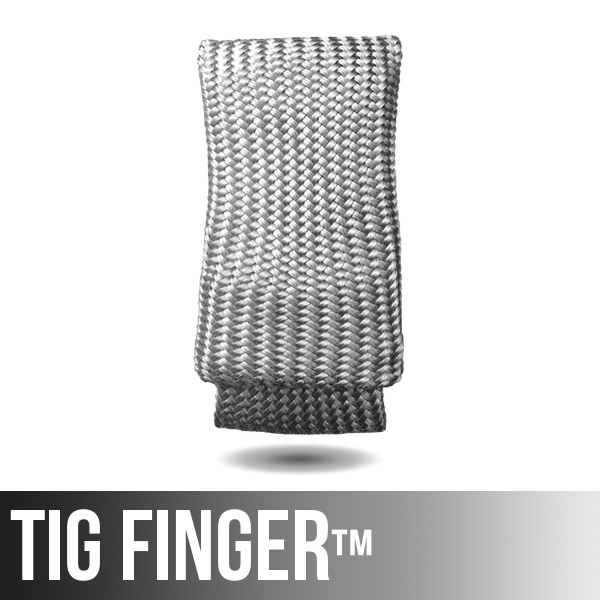
All right. We’ll get into the padding of the beads now. Now that that bead is run all the way around that edge, this thing’s nice and warm. It’s probably around 250 degrees or so. I’m not really propping my hand on it. I’ve got my palm propped on the table. Otherwise, my gloves would get kind of warm. Later on, I’ll throw a TIG finger on there and prop my hand on it when this thing gets really hot.
That number eight clear cup is just illuminating everything, and it’s making this thing film a lot better than if I was using a pink … a Lumina cup. It’s not necessary for welding aluminum to use a clear cup, definitely, but you can see right here, if I were down in a hole or something, I could be seeing right through the cup, feeding rod if I needed to. That’s a big benefit, but the other benefit that I find is just that it kind of lights the path for me.
So I’m trying to stack this bead exactly halfway on the previous bead, and now, I’m getting a little left hand practice. And things go a little slower when you’re rusty, when you’re not welding with your left hand every day. I used to have to do this a lot, and now, since I don’t have to hardly ever weld with my left hand, I have to intentionally do it sometimes just to halfway stay in practice. And even after just a few beads, I could feel it kind of getting more and more comfortable. Still a little slower, though, than going with my dominant hand. I think going left-handed is a really good idea, too, when you’re learning. It makes you stop and think about that puddle. It makes you think about how you’re feeding wire, because it’s not second nature, so you have to think about it.
This is the third run around it. I’m not going to show every single bead on this thing or we’d be here all day, but just enough to talk about some more things. Padding aluminum like this really gets that filler rod hand up to speed a lot quicker than other things do, because you have to feed so much more aluminum rod than you do, say, steel or stainless steel. It just feeds in the puddle like butter, and so it requires that filler rod hand to kind of conform and get up to speed.
Here, again, I’m going left-handed again here. You see how slow things are moving, but they’re getting quicker, getting to feel … it’s getting to feel better, more second nature. This is the time to experiment with different ways to feed wire with your hand and different ripple spacing. Maybe even experiment with different frequencies, if you have an inverter where you can do that. Experiment with what’s too much gas, what’s not enough gas flow. I’m running about 15 … in between 15 and 20 CFH here with this number eight cup.
If I were to drop cup sizes down to a five, for instance, I might only be using 12 CFH. I don’t like to use any more than it takes on aluminum, because you can really tell the difference in an erratic arc if you’ve got the argon flow up. Say on this cup, if I had it up around 40, I could see a … I could just hear a big difference. It would be a really loud arc and an erratic arc, and so it smooths the arc down when you can just use just enough argon flow. That’s been my experience, anyway.
I mentioned before, at times, I was max pedal at 200 amps, but when I get the piece warmed up, I can … I’m probably closer to 150. But I’m really pushing this torch pretty hard. It’s a 150 amp torch, and I feel it getting pretty warm. Cup’s holding up pretty good, but I am going to swap over to a regular pink style ceramic stubby cup here, a number six. And I’m going to be using 15 CFH with that.
Still getting some right hand and some left hand practice. Finally getting up to speed a little bit with that left hand, and I decided to get a little bit creative and go in different directions and make this thing look a little cooler. But this is very similar to some of the repairs I’ve seen on aerospace castings, where you do a whole lot of buildup to replace a whole lot of metal that got knocked out, cracked, you had to route it out because of corrosion and cracks and things like that. This is very similar to aerospace casting repair. Just great practice for that.
Well, that did me some good. I could tell my left hand was getting up to speed a little bit more. It was a lot of fun, and you learn something every time you do something like this. So again, if you’re going to do the drill here, an eighth inch is probably a really good thickness to do. That way, you don’t need as much amps, and your air cooled torch won’t get as hot as mine did. But hey, whatever you’ve got laying around, you can make it work. Thanks for watching. Please visit my store at weldmonger.com. See you next time.


January 10, 2018 at 12:42 PM
What size tungsten, 1/8″ ?
January 2, 2018 at 12:54 PM
On the video aluminum drill ,
You did not mention adding helium to your argon , I do this on my Lincoln 175 sq wave
And have tig up 1/2” aluminum plate with no problem not even using full power.