Video Transcript
Welding Aluminum at JD’s Shop
Today, we’re doing a little tig welding on aluminum, on a aluminum awning project at JD’s shop, Apex welding and we’re pushing this 200 amp machine pretty hard. Full disclosure here, this is sponsored video, but I did not pay for this machine. I asked them to send it to me because I got a lot of questions about it. Couldn’t answer it. All I could say was I’d never welded with it before.
So, I’m gonna push it, today, hard, set max 200 amps. And I’ll be full pedal for a lot of the project here. This is not the first job that we’ve done with this thing. It’s been in JD’s shop now for several months. We’ve done several DC jobs with it. We did this aluminum casting job here where you can see I’m using the arc, the cleaning action, just to kind of boil oil out of the casting before I start puddling it.
One thing I did notice on this job and this … Just strictly, I noticed it on AC was it’s very important to have a really good ground. I think this machine starts in electrode positive and so if you intermittently lose your ground, you get a little tungsten flare us. So, once I got a really good ground, that problem seemed to go away.
Today’s job is this big aluminum awning frame. You can see the dimensions calls for a 33 foot span, so hauling this thing to the job site once it’s fabricated in the shop here is gonna be, you know, probably one of the bigger chores.
Didn’t provide the angels on here so, JD just laid out some string lines on the floor. Used the angle finder. Anytime you’re doing a triangle like this, you know, one important tip is all the angles have to add up to 180 degrees on the inside. So if you don’t get 180, you know you’ve done something wrong.
Using a Metabo 6 inch here. This wheel is not designed for aluminum and it did grab quite a bit. Spraying some WD40 or using some bar soap on a wheel like that helps a lot on aluminum. Or just using the proper wheel probably is the best thing.
So, we’re gonna put end caps on these pieces here and they’re all gonna be sanded off. The knobs here on this machine are, you know, dial knobs so you can see what you’ve got, but they are pretty sensitive.
I’m gonna do a little welding today and JD’s gonna do a little welding today too. Now, JD focuses on, you know, steel for the most part. Dual shield flux core and things like that, but what better time to get your hand back in aluminum than on something that you’re gonna sand off the welds anyway.
Just gonna use this little camel grinding flap disc here, designed for aluminum. And it did a pretty good job. Here, I’ll show you in just a second here. It doesn’t load very much. You see just a little bit of aluminum chunks on there where it smeared. But it did a pretty good job.
Four and half inch disc with a six inch Metabo, you can really … You can bare down and really take off some metal.
Once … We’ll do a little bit more touch up work on those. It’s strictly just for appearance. These are gonna be visible from the bottom. People walking around. So using the build-pro table here. Strong hand, build-pro, just really super handy to get clamping. Anywhere on the table you can clamp something down. So we’re getting the angles here and using these extrusions for stops and clamping it down then we can put the really long pieces that we just put end caps on and clamp them against that. And if the angel comes out a good fit and those are all clamped up good and tight, we know we can’t be far off.
Alright. We’ll be getting the tack weld here very soon.
Got just a little bit of a bevel on that piece and you can see there, we’re right almost 144 degrees.
And we’ll square this one up again, using the angle finder at 72 degrees.
And we’ll get some tacks on it.
So I’ll clamp down. Not gonna move.
A few tack welds and then we’ll get … Weld what we can here in place. And you can see I’m feeding the filler wire from the side here. That’s mainly because gotta a camera in between me and the weld. That’s also my excuse for shaking around like I’m doing.
Once again, I’m set. I have 200 amps on the machine and probably should have actually just really drove that weld in there a little bit more because it’s gonna be sanded off. We’re gonna put a doubler plate over this particular side.
For this weld, I will drive it in there hard. Maybe a little too hard at time. You can see here in just a second I have to stop and fill in a keyhole. You can’t really see the keyhole from the angle of the camera but it opened up with me and I just crammed some rod in there and, you know, I’m really sinking it in there for the penetration.
So that one came out probably just about flush. Maybe even slightly below flush in certain places, but we’re gonna do a little sanding with that flap disc anyway.
Now we’re gonna go over to the plasma cam and create a doubler for this thing. And I’ll show kind of just how the process here. Snapping some lines. You’ve got a grid. All those dots are a grid on here. And it’s very easy to get, you know, your dimensions. You can select your angles and all that in a separate menu that I won’t show right now, but you know, snapping a couple lines. Copying them. Dragging them around. And then getting rid of the unwanted cut lines and then, you know, basically you create your cut path.
Get rid of the wanted ones, that like I say, is smooth. You know, you can zoom in on all the corners and you can get rid of those little lines and then once you’re satisfied, boom. You hit go and this is sped up. It doesn’t cut quite this fast, but it sure did put a nice crisp edge on that aluminum.
Aluminum doesn’t typically cut quite as good as steel, but this is a nice sharp edge. We took a flap disc and cleaned all that draw saw off prior to welding. It didn’t take much at all.
So that was a 3/16, roughly five millimeter, thick plate, doubler plate.
And most of the … This is three inch, three inch square tubing, 1/8 inch wall that we’re welding it to. There are other, some other pieces that will go on later that are 3/16 wall.
And this is where I’m pretty much maxed out at 200 amps.
Which wouldn’t seem like it would take quite that much, but this is a large heat sync. The … You know, when you got something this big, aluminum really pulls the heat out. This is one of those jobs where mixing a little bit of helium in with the argon, or using a premix something with maybe 50% helium, you would really notice a difference.
It looks like from the weld, I should have maybe spent just a little more time cleaning … Probably a little remaining oxidation on that plasma cut surface.
But I think it’ll be fine.
You know, you can see some of the stuff boiling up there just a little bit.
This is one of those areas that’s not really gonna be visible. It’ll be on the inside. I chose the inside to put the doubler.
So once that was welded up, we put this other cross member in here and you might notice, we’re varying from the print. JD got verbal permission to do that. I don’t really know exactly all the ins and outs, but main thing is to maintain the overall span and the peak height.
And this thing is gonna have some signage in it, too, that we’ll show you in part two. We’re doing so more plasma cam work. Cutting the signage, the letters and fastening them in there as well as taking it on site and hanging it and put it in place.
So, that should be fun time.
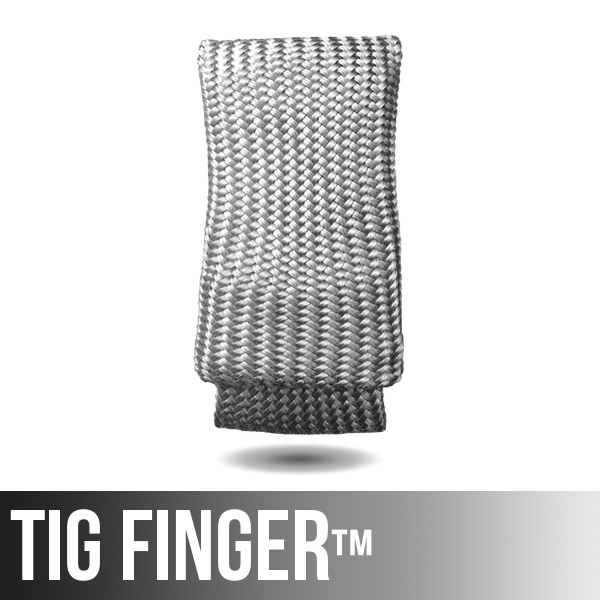
Now, a little commercial here. This is my tig finger product and I think it’s readily apparent that this where it really excels when you can just kind of glide it along on something that otherwise would be pretty much too hot to glide along with your pinky. And I’ve the regular tig finger. It’s what I’m using here, but I’ve also go a XL that you can slip two fingers in it and is a little thicker for those really hot jobs or if you just got big, big fingers.
Again, full pedal. 200 amps. Trying to just motor out as quick I could … at 200 amps anyways. I’m actually, you know, could have gone a little faster if I had a few more amps, but that’s about right for travel speed using a 1/8, a 3.2 diameter filler mill here.
Speaking of filler metal, 4043 is probably one of the more common ones for a job like this. This is 6061 aluminum. But there’s a new filler wire, fairly new. It’s been out several years now. It’s Maxal. I think Hobart makes it now. It’s 4943. And I’m beginning to really, really like it.
Using 4043 here, like I said.
You can see sometimes when the heat gets built up and the cooling rate slows, there’s a little graininess to the appearance and that’s very typical of 4043. 4943 will do it as well if you get things too hot and it’s … The cooling rate slows down.
Well, that’s it for part one. Part two, we’ll do a little onsite with a spool gun. And we’ll hang this thing in place. And so that’ll be a cool day.
Again, I support these video with sales from my online store at weldmonger.com. Let me give you a little, just a little quick peek here of my tig finger product again. This is the regular standard tig finger. See it glides along nice. Usually one finger in it. And then the XL is much thicker and two fingers will slide in it for most people. And again, you can glide along and hold on some really hot metal right next to the weld for those times when you just can’t find a prop.
Alright. It’s also bundled. If you get one of each, you can get a little savings. And you can learn more at weldmonger.com.


Leave a Reply